


 |
Bird Netting is one of the most popular methods used for protecting structures against all common species of urban bird pests. Its success is due principally to the fact that, if it is installed correctly then it is virtually the only system that can be used with confidence in places subject to high levels of bird infestation and where birds are roosting at night.
Bird netting is very versatile as it can be used at all angles for proofing a wide variety of structures, from small perches to complete building facades and roofs. The square mesh running horizontally and vertically ensures that the netting is virtually invisible when installed correctly. The bird netting is completely humane and cannot physically harm the birds in any way, it simply deters them, so they move on to perch somewhere else.
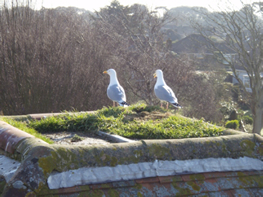
Before
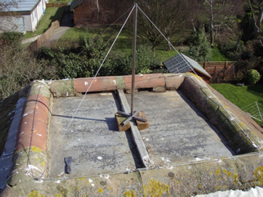
During
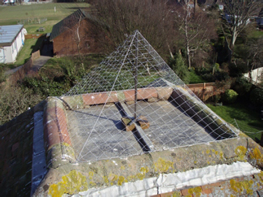
After
For balcony netting we have put together this rough installation guide. If you are ever unsure about installing bird netting, refer to a specialist installer, you can find one local to you by visiting our Find A Pest Controller Search
PestFix Pest Control Supplies is a distributor of both professional and amateur use pest control products - including PPE.
We have the primary objective of putting you, the customer at the centre of their business, rather than banks or shareholders. It is our philosophy that you, the customer, always comes first.
PestFix
Unit 1-3 Cedar Park
30 Terminus Road
Chichester
West Sussex
PO19 8GT
Sales Enquiries
Tel: 01903 538 488
Fax: 01903 539 331
Email: [email protected]
Press Enquiries (Journalists Only)
Email: [email protected]
 |  |
|
|
|
|
|