Bird Shock Flex Track System requirements:
- Flex Track
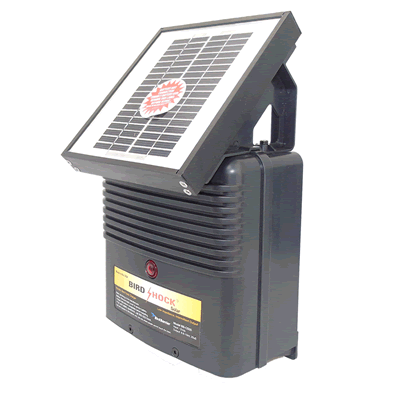
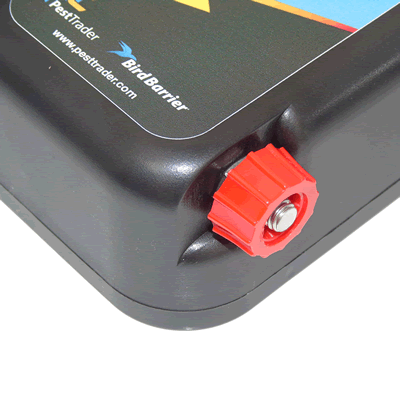
- 240V Mains Powered Energiser or Solar Powered Energiser
- Lead Wire
- Ring Terminals
- Electrical Connectors
- Silicone Adhesive
- Straight and Corner Quick Connectors (Optional)
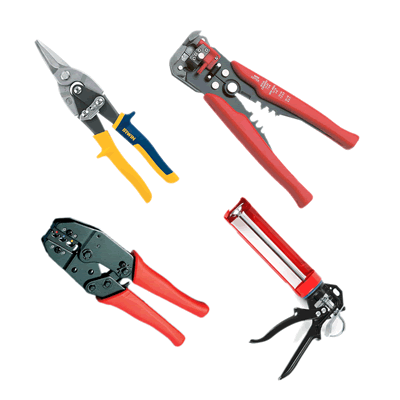
Tools required for installation:
- Cut & Strip Tool for Lead Wire
- Track Cutting Shears or Strong Scissors
- Connector Crimping Tool
- Caulking Gun for Adhesive Application
- Digital Voltage Tester (Optional)
- Tape measure
Flex Track Location Planning
Select a suitable location for the Energiser. Solar Powered Energisers ideally need to face south, so that they receive at least two hours of sunlight each day. Mains Powered Energisers need to be installed out of the weather.
Its not necessary to install the charger unit close to the track. You can run lead-out wire from the unit to the track up to a total lead wire and track distance of 150 metres.
Energisers can be connected at any point along the track, they do not have to be connected to an end of the track.
Before installation plan the entire Bird Shock Flex Track layout. Cuts to the flex track, corners and straight connections should be made before adhering the system down.
Do not connect the Energiser to the system until you have completed all connections.
Connections
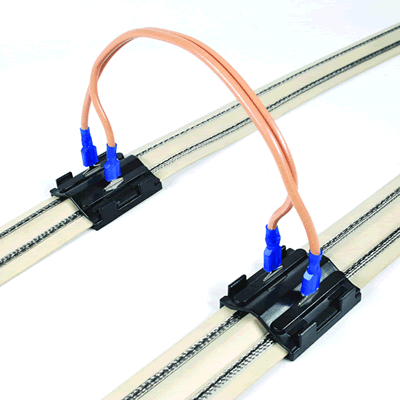
Straight Quick Connectors:
- Each straight quick connector has a base and top.
- Place the base underneath two meeting ends of Flex Track.
- Place the top of the quick connector on top of the meeting ends of Flex Track and apply pressure so it is firmly secured to the base.
- If you are not using the male spade connectors that come out of the straight quick connector for a jump point or power supply, then bend them outwards.
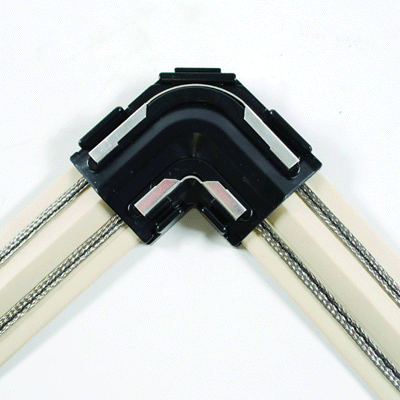
Corner Quick Connectors
- Each straight quick connector has a base and top.
- Place the base underneath two meeting ends, unlike the straight quick connector these ends will fit into the slots and have a gap between them.
- Place the top of the quick connector on top of the meeting ends of Flex Track and apply pressure so it is firmly secured to the base.
Jump Points Using Quick Connectors
- You can power multiple rows by creating Jump Points.
- Ensure two straight quick connectors are placed level with each other on each run of flex track.
- Create two jump leads using lead wire and female connectors. Ensure these arent too long as they may cause snagging and wear, or too short as they may pull on the male connections and come loose or cause damage.
- Attach these jump leads to the male spade connections that are protruding from of the straight quick connectors.
Power Supply Connections
- Create power connection leads using lead wire, ring terminals and female connectors.
- You will need to create two power connection leads which each have 1 end of female connector and 1 end of ring terminal.
- The ring terminals will be connected to the power supply unit and the female connectors to a straight quick connector with protruding male spade connections.
Once you have determined your full Bird Shock Flex Track layout and have created all connections and jumps you should test the system for breakages using a digital voltage tester.
Surface Preparation & Adhering
Surface preparation is the key to a successful installation. Do not install Flex Track onto contaminated or unprepared surfaces.
Use Surface Cleaner (BS332) to prepare greasy surfaces prior to priming.
Use Surface Activator (BS365) to prepare polished surfaces such as metal or plastic prior to priming.
Always prime the surface to be adhered to with Silicone Spike Adhesive (BS328) and our Disposable Priming Brush (BS335), regardless of the composition of the surface. This ensures a long-life bond.
Use masking tape if necessary to avoid priming an area outside of where the spike base will cover. This will ensure a neat and professional finish.
Do not lay flex track on unsound surfaces i.e. flaking paint, rusty metal or rotten timber. Take time to repair these surfaces prior to installation.
Do not install Flex Track if heavy rainfall is predicted within 24 hours of installation. The silicone spike adhesive will take 24 hours to cure.
Ensure you place warning labels around the Bird Shock Flex Track system to advise others of the electrical nature of the system.
Once the system has been completely installed you can then connect it to the Energiser.