Download PDF version
The objective of the solar panel exclusion kit WM134 is to put a physical barrier between the pest Feral Pigeon and its intended destination, under your solar panel array. Solar Panels provide the birds with the perfect protective habitat in which to roost and breed. Pigeons can squeeze through any gap greater than 50mm / 2, therefore great attention to detail and careful preparation is required to achieve maximum results.
Warning: Working at height
Working at height can be hazardous, use appropriate access equipment, such as a roof ladder, scaffolding or mobile elevated work platform to provide safe, all-round access to the work area. Wear suitable fall arrest equipment and do not work during inclement weather conditions where ice, high winds, rain or electrical storms could be a hazard.
Warning: Guano clearance
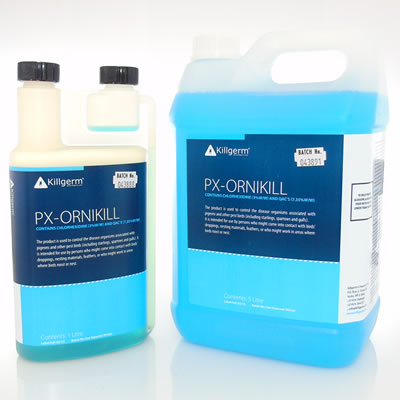
Bird droppings and nesting material contain organisms called zoonoses which are capable of transferring many types bacterial and spore-born disease between the host and humans, including Ornithosis, Chlamydia, E-coli & Salmonella. Nests and feathers can contain biting insects/parasites including Red Mite, Ticks, and Fleas that can feed on human blood and transfer disease. Always clean the work area thoroughly with a proprietary avian disinfectant such as Guanaway or PX Ornikill, removing all traces of bird droppings and nest debris (in accordance with local wildlife protection legislation)
Warning: Electric shock
Solar panels are ALWAYS live and supply DC voltage; ensure you fully understand the solar panel system and how to avoid risk of electric shock prior to commencing work. If in doubt seek professional advice/help from a pest controller, solar panel installer or electrician.
1. Thoroughly clean solar panels to remove all traces of faecal matter and nest site debris. Use an avian disinfectant such as PX Ornikill or Guanaway and dress the area with a coarse surface spray as per the manufacturers instructions. Wear appropriate personal protective equipment.
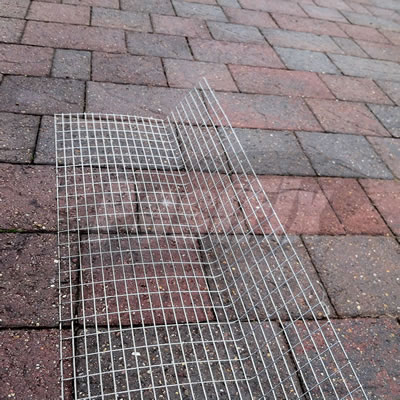
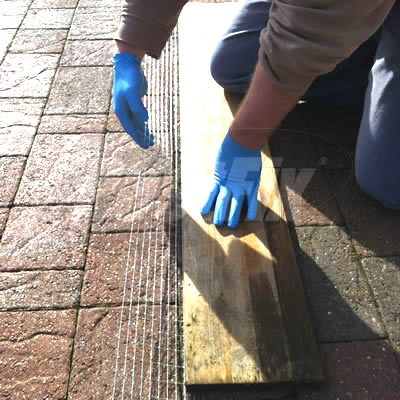
2. Cut the welded mesh roll into manageable section of approximately 2 metres, on the ground. This will make working with the mesh at height easier. Wear protective gloves when handling and cutting the mesh, it will have very sharp edges.
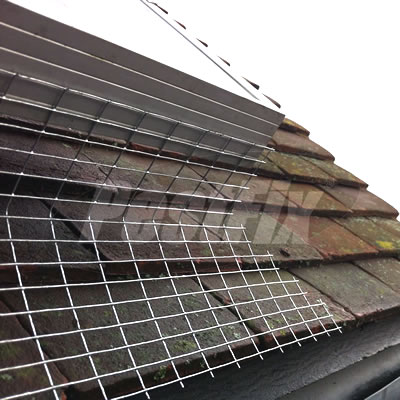
3. Using a length of timber as a straight edge fold up the mesh approximately one-third of the width in from the outside edge at approximately 30 degrees. This will make the mesh easier to lock into position when applying the solar panel mesh retaining clips (WM132).
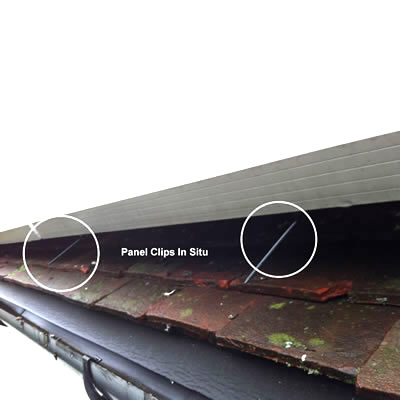
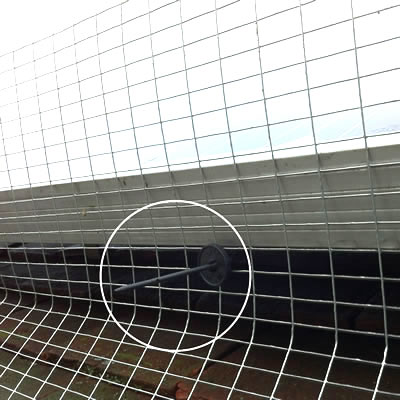
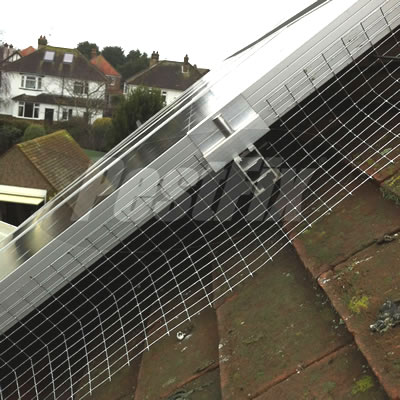
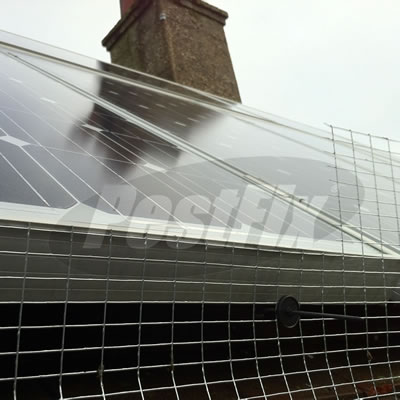
4. Slide the Solar Panel Mesh Clips (WM132) in to position on the return lip on the underside of the solar panel. Use a minimum of 2 clips on the panels short edge and 3 clips on the long edge. It may be necessary to use more clips where mesh panels overlap. Offer up the first panel with the bent section lowermost and touching the roof surface.
5. Line up the appropriate mesh holes with the solar panel mesh clips you installed earlier and slide the mesh over the serrated shaft of the clip so that it protrudes through the mesh. Slide on the locking disc. Warning these are one way locking mechanisms and cannot be reversed, so ensure you are happy with the mesh panel alignment before pushing the locking disc home. Push it all the way down the shaft so that it pulls the mesh close to the solar panel and roof tile. The bent section of mesh will help lock the screen into position against the roof.
6. Always install the mesh panels starting from an outside corner into the middle of the panel array. Start at each end and work your way towards the middle. Cut the mesh at 45 degrees across the bent section of the panel to form a neat corner.
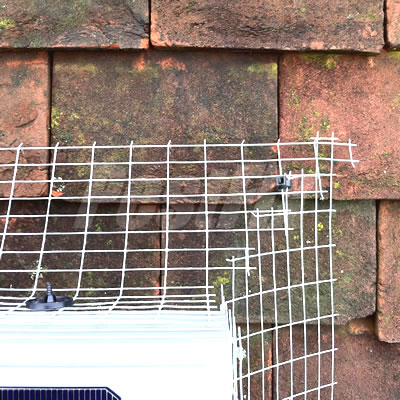
7. Cut the adjoining perpendicular mesh channel at 45 degrees in the opposite direction and abut to the 1st panel to form a chamfered corner. Secure using the cable ties provided.
8. Ensure that adjoining panels overlap by 8-10 squares and are locked together using a solar panel mesh clip in the middle.
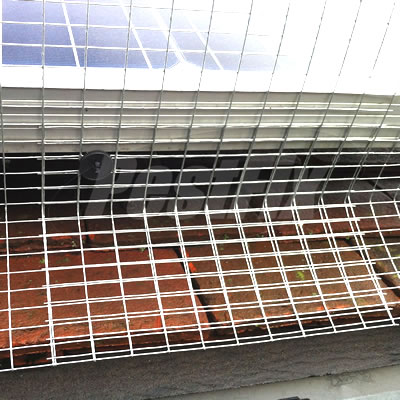
9. Obstructions such as mounting brackets and wiring should be carefully cut around, taking great care not to leave too big a gap to allow the pigeons to gain access. (No more than 50mm)
10. Using the wire cutters provided neatly trim-off the excess mesh and discard, leaving the mesh flush with the top edge of the solar panel frame. Then trim-off the tails left over from the solar panel mesh clips to give a neat finish.
11. If correctly installed in accordance with these instructions your Solar Panel Mesh Exclusion Kit should give a long lasting solution to a messy problem and be practically invisible from the ground.